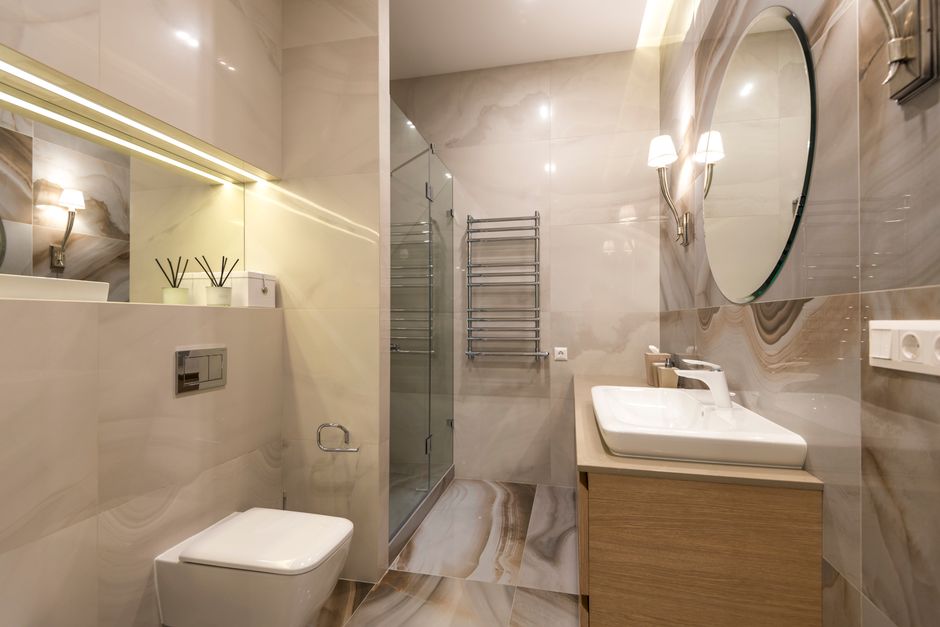
What Should I Coordinate with an LED Mirror — Tiles, Storage, or Lighting First?
In compact UK bathrooms, where every inch counts and natural light is often limited, choosing the right LED mirror can make or break the room’s appeal. Developers, landlords, and interior designers face the crucial question: when refreshing or specifying bathroom interiors, should you prioritise the tile layout, storage needs, or lighting layers in coordination with the LED mirror? This blog post unpacks the design hierarchy to help you achieve a cohesive, practical, and visually appealing bathroom — an area that Forbes Global Properties consistently highlights as a major driver of property appeal.
Why Bathrooms Are a Key Driver of Property Appeal
According to Buildington’s data on residential developments, bathrooms are often the first area that buyers or tenants scrutinise during show homes walkthroughs and property listing photography. The bathroom vanity wall — where the LED mirror is usually mounted — becomes the natural focal point, as visitors instinctively stand there to check their reflection and sizing. Ensuring this wall works well visually and practically is crucial in making a positive first impression.
With compact spaces, each design choice reverberates throughout the room. Without thoughtful coordination, buyers may perceive the bathroom as cramped, poorly lit, or impractical — impacting perceived property value, no matter what the marketing brochures claim. That’s why understanding the balance between tile layout, storage needs, and lighting layers around your LED mirror is essential.
Limited Natural Light in UK Bathrooms: The Lighting Challenge
Most UK residential bathrooms lack substantial windows, making reliance on artificial lighting indispensable. This is especially true for flats and townhomes where windowless bathrooms are frequent. In these settings, LED mirrors contribute significantly beyond vanity reflection; they become a source of task lighting that supports daily routines such as shaving, make-up application, and grooming.
Task lighting at the vanity must be bright, uniform, and shadow-free. However, it shouldn’t completely replace general illumination that lights the entire bathroom environment. Customising these competing needs means carefully layering lighting design:
- Task lighting: Provided by LED mirrors, preferably front-lit or combined front- and backlit types.
- Ambient/general lighting: Overhead downlights or ceiling-mounted light fixtures that offer bath-wide brightness.
- Accent lighting: Secondary sources that can add depth, for example, recessed cabinet lights or wall sconces.
Front-lit vs Backlit LED Mirrors: What’s the Difference?
LED Mirror World, specialists in modern mirror tech, highlight two primary lighting methods for mirrors:

For compact bathrooms with limited natural light, front-lit LED mirrors should be the minimum for task-focused functionality. Backlit options can enhance ambience but rarely replace primary task lighting.
So, What To Coordinate First: Tile Layout, Storage, or Lighting Layers?
As a 12-year residential development copywriter, I’ve sat through countless snagging chats and observed how buyers scrutinise the bathroom spaces. Here’s my seasoned take:
- Start with Storage Needs: The bathroom vanity wall typically incorporates both mirror and storage — usually cupboards or shelves. Since your LED mirror will be fixed in this workspace, double-check the cabinetry dimensions and door-opening mechanisms before selecting the mirror size or type.
- Then Lock Your Tile Layout: Tile patterns and grout lines that run horizontally or vertically can visually expand or contract the space. Planning the tile layout before the mirror installation ensures harmonious alignment, especially crucial behind the vanity wall where the mirror sits. Buyer's eyes gravitate towards symmetry and continuity — a mismatch between tile geometry and mirror edges is an immediate giveaway in property listing photography.
- Finally, Layer Your Lighting: Once storage and tiles are finalised, tailor your LED mirror choice to complement the ambient and accent light sources already set, factoring in wiring placement and symmetry. This reduces awkward lighting shadows or hotspots around the vanity — something that Buildington’s client feedback often flags as a snagging issue.
Why Storage Comes First
Storage dictates the mirror's dimensions and installation height. Oversized mirrors that conflict with cabinet door swings or encroach on shelving make a bathroom feel awkward and uninviting. From show homes to completed developments, the vanity wall is where buyers literally and figuratively judge the bathroom — standing there to test storage capacity, buildington.co.uk mirror size, and lighting combined.
Many specify a bespoke cabinet-to-mirror fit to optimise space in compact UK bathrooms. This avoids basic errors like purchasing a standard mirror first and then struggling with insufficient storage or impractical access.
The Tile Layout’s Role in Creating Visual Harmony
Tiles are the 'background stage' of your bathroom drama. Choosing where and how to lay tiles behind the LED mirror affects:
- The perceived wall size and height
- The mirror’s visual impact and ‘pop’ against its backdrop
- How well the grout and fixtures lines symmetrically align
Property listing photography emphasises clean, coherent lines. Where grout runs haphazardly or breaks awkwardly at mirror edges, it conveys rushed or low-quality finishes. Coordinating tile layout before mirror installation permits:
- Aligning mirror width to tile width, e.g., fitting mirror neatly inside a tile’s vertical grout lines
- Using tile borders or feature tiles to frame the vanity wall
- Establishing a tile colour or finish that complements the mirror’s frame or lighting colour temperature
Balancing Lighting Layers for Effective Bathroom Illumination
With storage and tiles physically set, focus shifts to lighting — specifically layering. I always assess how many light sources the bathroom really has, including bulbs inside storage units, ceiling lights, and especially the wiring placement of LED mirrors. Buyers usually notice if cut-outs or obscure junction boxes disrupt clean lines or the mirror’s symmetry.
Consider the practical aspects:
- Does your LED mirror provide enough lux for daily grooming routines? (Forbes Global Properties reports that top-tier developments guarantee 500+ lux at the mirror surface.)
- Have you allowed for dimmable ambient light to adapt mood and reduce harsh contrasts, especially in windowless rooms?
- Is the colour temperature of your LED mirror light consistent with other bathroom lighting? Mixing overly cool and warm LED sources will jar.
Wiring Placement and Symmetry Matters
It’s a detail often overlooked in specification. The LED mirror’s wiring must be concealed within the vanity wall cavity or channeled discretely. Visible wiring or asymmetrical switch panels ruin the perceived quality in photography or during show home visits. Align wiring runs with cabinetry edges or tile grout lines for discreet appearance.
Extra Tip: Mind the Vanity Wall!
Since the vanity wall is the bathroom’s hotspot — where people stand and focus — every element there deserves extra attention. The LED mirror, tile background, storage functionality, and lighting work in symbiosis here. Getting this right enhances your bathroom’s appeal on listings by Buildington and eye-catching photography for Forbes Global Properties portfolios.
Summary Table: Coordination Priority
Step Element Reason Key Considerations 1 Storage Needs Determines mirror size and installation options Door swings, unit depth, alignment with mirror edges 2 Tile Layout Provides visual backdrop, defines symmetry Tile sizes, grout lines, feature borders, colour matching 3 Lighting Layers Ensures balanced illumination and wiring symmetry Task vs ambient light, LED mirror type, wiring concealmentClosing Thoughts
Choosing and coordinating your LED mirror with tile layout, storage, and lighting layers in that order is a pragmatic, experience-backed approach suited to compact UK bathrooms where natural light is scarce. This prioritisation ensures practical daily use, enhanced visual appeal in show homes and photography, and critical buyer approval — which ultimately influences property value and success in a competitive market.
By collaborating with trusted suppliers like LED Mirror World, referencing property insights from Buildington, and benchmarking against premier residential projects featured by Forbes Global Properties, you set your bathroom specifications up to impress — not least at the all-important vanity wall.